Hey everyone ! Today in media we got a lesson on how to use cameras, dump footage, and import them into our computers using Pinnacle Studios to edit and create our movies. My teacher gave us some quick directions when checking out cameras and SD cards, we all have sign out sheets that we need to use and in them we fill out the equipment information and bring it back into our class folder that way no camera, tripod, or SD is lost. And also a reminder about putting everyone in my groups name on our media hallway pass for safety percaustions. I also received a lesson on how to work the camera. To charge the camera there is a U shaped slot next to the hand grip and that is where you put in the charger but it is important to make sure the camera is closed otherwise it will not charge. The SD card needs to be put in the SD door slot and to start and stop the camera or do a take, push the red button.
Then I was given a lesson on dumping. Dumping is when you take footage from the camera and put it onto the computer you are using to edit. In this class we will be using the program Pinnacle Studios to edit. So to start off, one person in our group will log on to Pinnacle Studios and it will always be that same persons log in info that we will use. We will do that to make sure we always have all of our updated work each time we log in. Take the SD card and put it in the USB port of your computer and then create a folder on your desktop for your footage. It is very important to create a folder so that all of your footage is secure in one place. Then you want to move all of your footage into your folder. Check in the DCIM folder of your folder to make sure all the correct footage and correct dates are there. If you can’t find it you might need to check in the private section and go to AVCHD and go into stream and in there should be everything on the SD card. Then to import you click important and the plus sign and look for your folder. Always import all of your footage and click start import and whichever piece of footage you want to use/ work on should have a orange box around it.
To begin editing you click the edit button and all of your raw footage should appear at the top of the screen. You can then click on the videos and drag them to down to cut and edit as you please. You can build your footage onto the AD track 2, the title is on top, then the footage, and then audio on bottom. To cut footage you move the mouse to right before you want to cut it then click the razor blade icon to split the footage and then delete the part you don’t want. To add transitions, you need to right click on the your footage and open effects editor and go to the transitions tab and up will pop different effects like light changing or screen changes like a split screen. You can also add texts and titles to your footage too and change the font and how the texts appear, it’s important to layer it and click OK and wait for it to load. To add music you follow the same instructions to import just make sure the music is saved as an MP3 in your folder. When you are finally finished editing and want to save and export you must go to export and go to settings and go to MP4 and click on best quality in the drop down tab and click start export and save as in your desktop folder and before you shut down Pinnacle Studios check to make sure your edited footage saved. This lesson was super helpful to me and was definitely needed becuase my group and I will soon be editing our own footage for our commercial.
Subscribe to:
Post Comments (Atom)
Short Film CR
A common element that my group’s short film Possessed took part in was the representation of a certain social group and social issu...
-
 Hello!! Even though my group and I are nearing the end of our short film journey it seems as though there is always still something to do. ...
 -
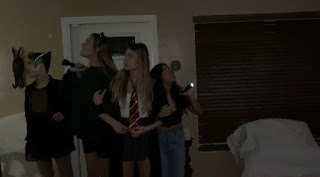
 Hello ! My group and I have begun filming for our horror movie entitled “Signed the Watcher” . I went over to my group member Jake’s h...
 -
Hello it is October 10th and today my group and I are starting our planning for our commercial! In the planning process we are going to ...
No comments:
Post a Comment